
Client Version:
First, create a new email message:
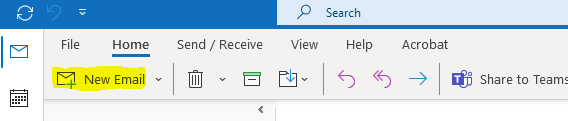
Add the required recipients of the email. Then, make sure that the message tab is selected on the ribbon. A button to create a new scheduling poll will appear between the “Editor” and “View Templates” buttons.

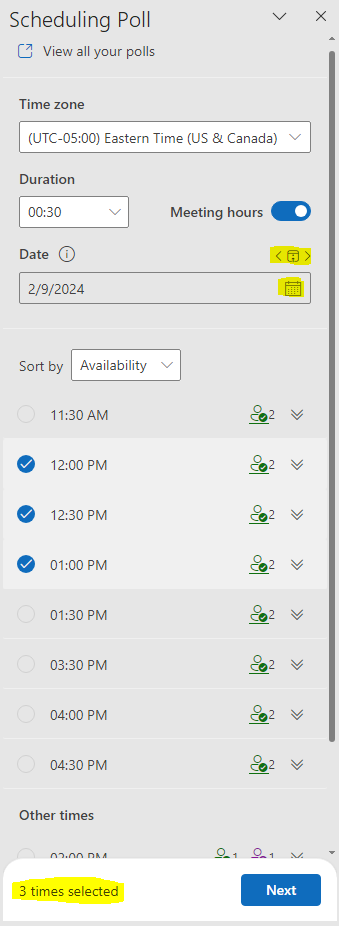
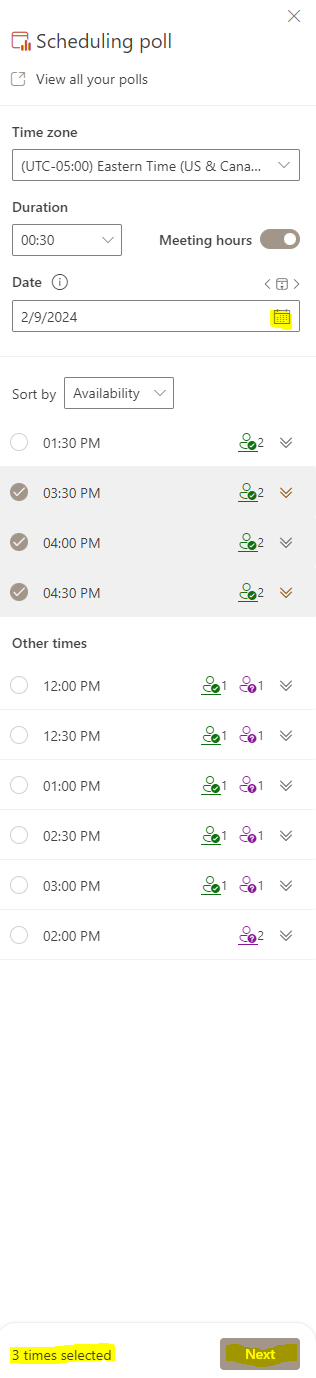
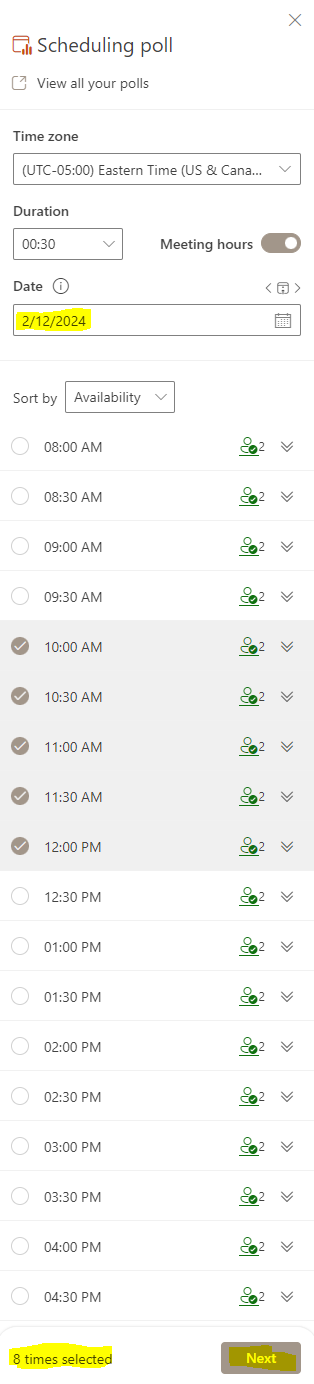
Select the required times for the poll. If you wish to make the poll span across several days, available times will have to be selected for each day, and the poll will save each day’s available times. A total number of times selected will be displayed for reference. Select next when finished.

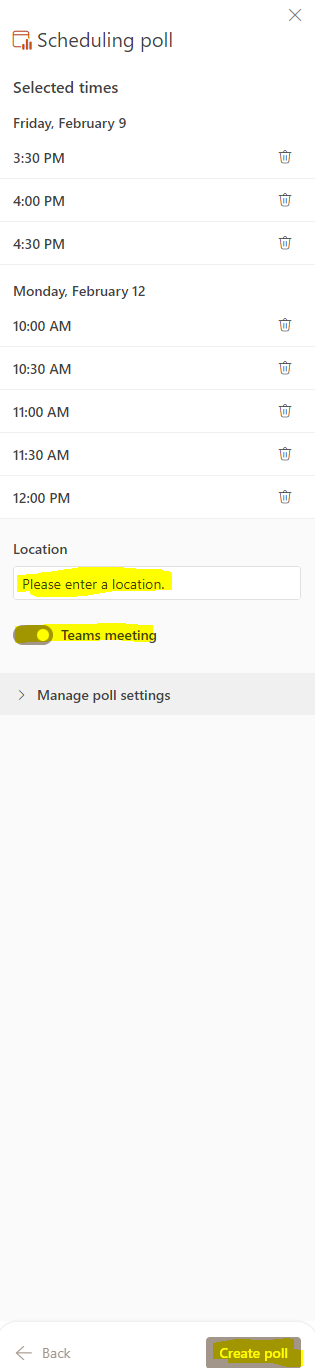
Determine a location for the meeting. If this meeting will not be virtual, toggle off “Teams Meeting”. Then select “Create poll”. The poll will now be displayed within the email message.
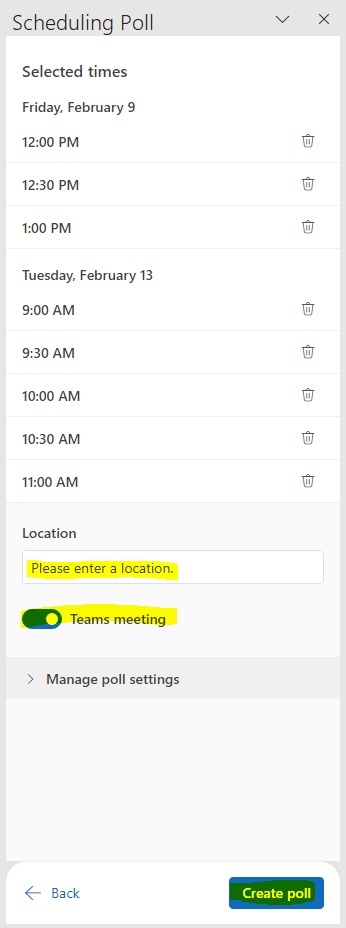
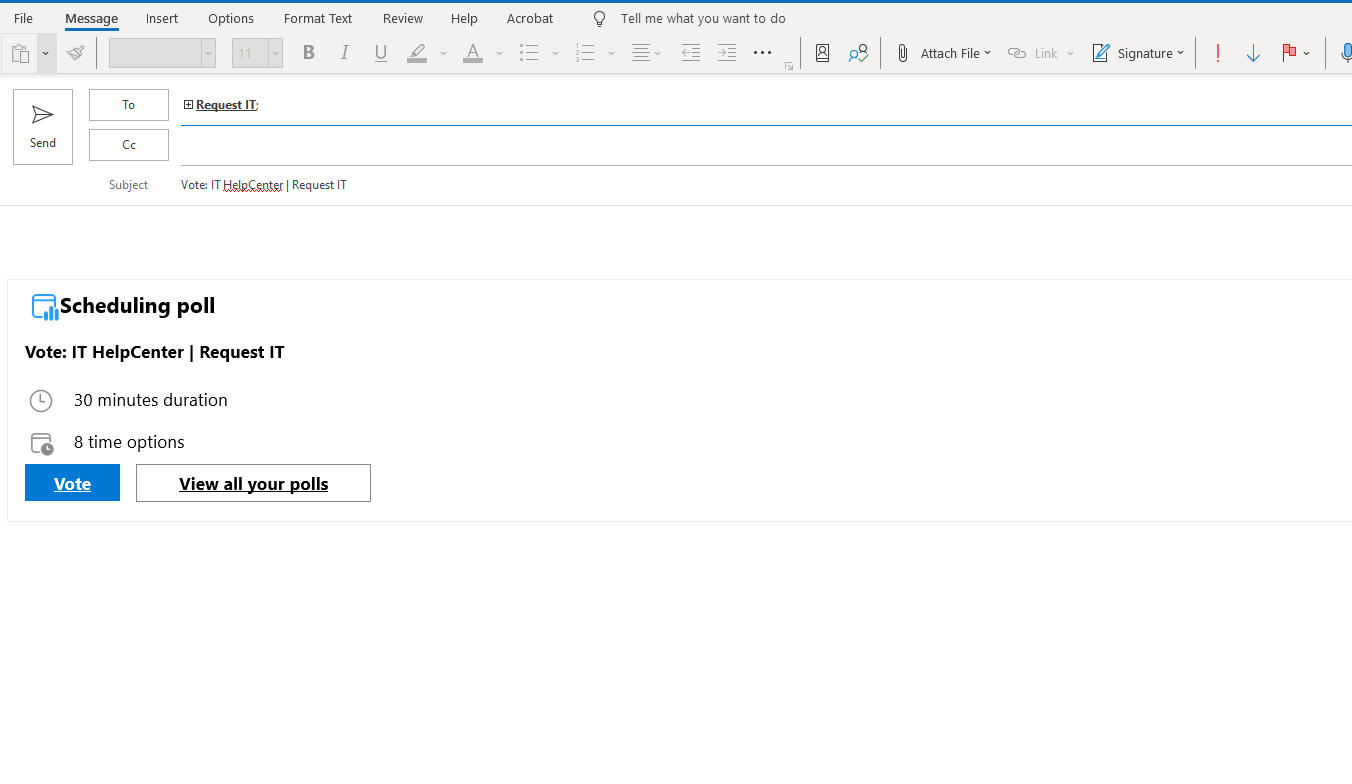
The poll will now be displayed within the email message.
Web Version:
Create a new email message:

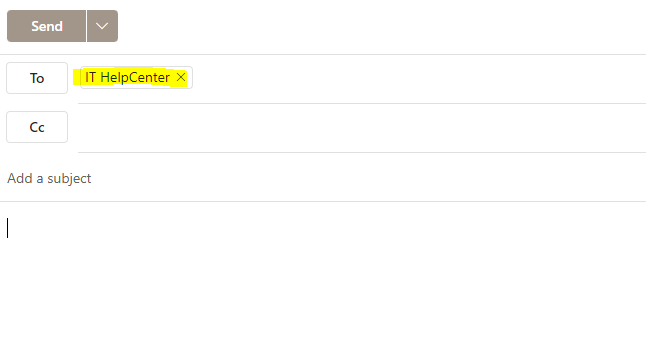
Add the required recipients of the email:
Make sure the “Insert” tab is selected on the ribbon. The “Scheduling Poll” button will be on the right:

Select the required times for the poll. If you wish to make the poll span across several days, available times will have to be selected for each day, and the poll will save each day’s available times. A total number of times selected will be displayed for reference. Select next when finished.
Determine a location for the meeting, then select “Create Poll” when finished.
The poll will now be displayed within the email message:
